


DIY Lintel Repair Techniques DIY: A Practical Guide for Property Owners
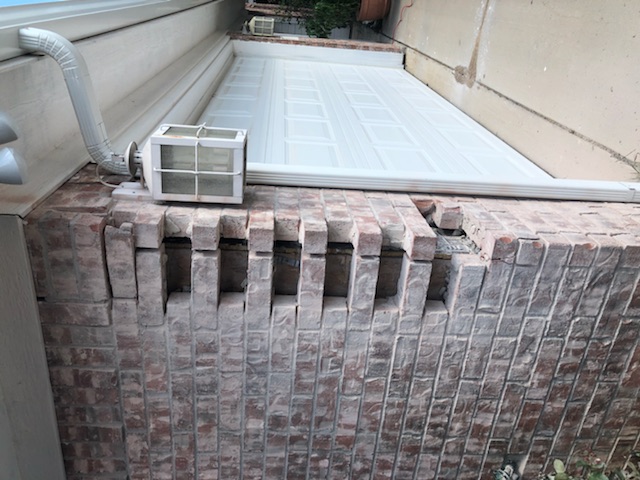
Lintels are crucial structural elements in your home or building. They support the weight above doors, windows, and other openings. When lintels fail or show signs of damage, it can lead to serious problems like cracks, sagging, or even collapse. But don’t worry - with the right knowledge and tools, you can tackle lintel repairs yourself. In this guide, I’ll walk you through DIY lintel repair techniques that are effective, safe, and budget-friendly.
Understanding Lintel Repair Techniques DIY
Before diving into repairs, it’s important to understand what lintels are and why they fail. Lintels are horizontal supports made from steel, concrete, wood, or stone. Over time, exposure to moisture, rust, or shifting foundations can weaken them.
Here’s what you need to know about lintel repair techniques DIY:
Identify the type of lintel you have (steel, concrete, timber).
Assess the damage carefully. Look for rust, cracks, or sagging.
Choose the right repair method based on lintel material and damage severity.
Prepare your workspace with safety gear and proper tools.
For example, steel lintels often suffer from rust and corrosion, while timber lintels may rot or warp. Concrete lintels can crack or spall. Each requires a different approach.

Tools and Materials You’ll Need for Lintel Repair
Having the right tools and materials on hand makes the repair process smoother and safer. Here’s a checklist to get you started:
Safety gear: gloves, goggles, dust mask
Chisel and hammer for removing damaged mortar or concrete
Wire brush to clean rust or debris
Mortar mix or repair mortar suitable for masonry
Epoxy or rust converter for steel lintels
Steel reinforcement bars (if needed)
Concrete patch or filler
Trowel and pointing tools
Measuring tape and level
Support props or acrow props to hold the structure during repair
Make sure you select materials compatible with your lintel type. For instance, use a rust converter on steel lintels before applying mortar to prevent further corrosion.
Do you put mortar on a steel lintel?
This is a common question and an important one. The short answer is yes, but with caution.
Steel lintels are often embedded in mortar or concrete to distribute the load evenly. However, if the steel is rusty or corroded, simply covering it with mortar won’t fix the problem. You need to:
Remove loose rust and scale using a wire brush or grinder.
Apply a rust converter or primer to stop further corrosion.
Use a high-quality mortar or repair mortar designed for steel lintels.
Ensure the mortar fully encapsulates the steel to protect it from moisture.
Avoid using regular mortar on severely corroded steel without treatment, as this can trap moisture and accelerate rusting.

Step-by-Step DIY Lintel Repair Techniques
Now, let’s get into the nitty-gritty of lintel repair. Here’s a step-by-step guide you can follow:
Step 1: Assess and Support
Inspect the lintel and surrounding masonry.
Use acrow props or temporary supports to hold the structure above the lintel.
Remove any loose bricks or mortar around the lintel carefully.
Step 2: Clean and Prepare
For steel lintels, remove rust with a wire brush.
For concrete lintels, chip away damaged concrete.
For timber lintels, check for rot and replace if necessary.
Step 3: Repair or Replace
Steel lintels: Apply rust converter, then patch with repair mortar.
Concrete lintels: Use concrete patch or mortar to fill cracks and spalls.
Timber lintels: Replace rotten sections or sister new timber alongside.
Step 4: Rebuild and Finish
Repoint the mortar joints around the lintel.
Replace any bricks or blocks removed.
Remove supports once mortar has fully cured (usually 7 days).
Step 5: Monitor
Check the lintel regularly for signs of new damage.
Address moisture issues to prevent future problems.
This approach balances safety and effectiveness, letting you handle lintel repairs without calling in expensive contractors.
Tips and Cautions for Successful Lintel Repairs
Here are some bold tips and cautions to keep in mind:
Always support the structure before starting repairs. Never risk collapse.
Use compatible materials to avoid cracking or bonding issues.
Don’t rush curing times. Mortar and concrete need time to set properly.
If the lintel is severely damaged or load-bearing capacity is compromised, consult a structural engineer.
Keep the work area clean and organized to avoid accidents.
Wear protective gear at all times.
Remember, DIY lintel repair techniques can save you money and extend the life of your property, but safety comes first.
When to Call in the Experts
While many lintel repairs can be done yourself, some situations require professional help:
Extensive rust or corrosion on steel lintels
Large cracks or sagging lintels affecting structural integrity
Timber lintels with widespread rot or insect damage
Historic buildings needing specialized restoration techniques
In these cases, a professional masonry or structural repair service can provide the expertise and equipment needed for a lasting fix.
Wrapping Up Your Lintel Repair Project
Taking on lintel repairs yourself is rewarding and practical. With the right preparation, tools, and knowledge, you can restore your lintels and protect your property from further damage. Remember to follow safety protocols, use quality materials, and monitor your repairs over time.
If you want to explore more about **diy lintel repair techniques**, check out trusted resources and guides to deepen your understanding.
Good luck with your lintel repair project - your home will thank you for it!
Comments