


DIY Lintel Repair Tips: A Practical Guide for Property Owners
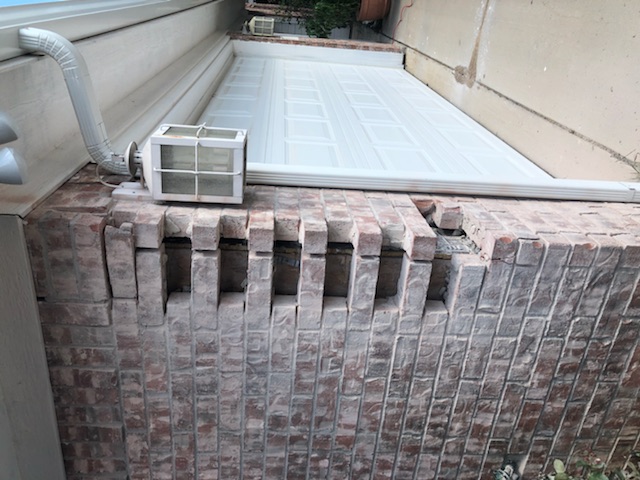
Lintels are crucial structural elements that support the weight above doors, windows, and other openings in your walls. When they start to show signs of damage, it’s important to address the issue promptly to avoid bigger problems down the line. Luckily, you don’t always need to call in a pro right away. With the right approach, you can tackle lintel repairs yourself. In this post, I’ll walk you through some effective DIY lintel repair tips that will help you restore your lintels safely and efficiently.
Understanding the Basics: What Is a Lintel and Why Repair It?
Before diving into repair techniques, let’s clarify what a lintel is and why it matters. A lintel is a horizontal support beam placed over openings like windows and doors. It carries the load of the structure above and distributes it to the surrounding walls. Lintels can be made from steel, concrete, wood, or stone.
When lintels deteriorate, cracks and sagging can appear, leading to structural instability. Ignoring these signs can cause serious damage to your property. Repairing lintels early not only preserves your home’s integrity but also saves you money on costly renovations later.
Essential DIY Lintel Repair Tips You Should Know
If you’re ready to roll up your sleeves, here are some DIY lintel repair tips to get you started:
Assess the Damage Carefully
Start by inspecting the lintel and surrounding masonry. Look for cracks, rust on steel lintels, or crumbling mortar. Use a flashlight and a small mirror to check hard-to-see areas.
Gather the Right Tools and Materials
You’ll need safety gear (gloves, goggles), a hammer and chisel, wire brush, mortar mix, steel reinforcement bars (if necessary), and a suitable sealant.
Remove Loose Material
Carefully chip away any loose mortar or damaged concrete around the lintel. This creates a clean surface for the repair materials to bond.
Clean the Lintel Surface
Use a wire brush to remove rust and debris from steel lintels. For concrete or stone lintels, clean off dust and dirt with a stiff brush.
Apply Repair Mortar or Concrete
Mix mortar or concrete according to the manufacturer’s instructions. Apply it evenly around the lintel, filling cracks and gaps. For steel lintels, consider using a rust-inhibiting primer before applying mortar.
Reinforce if Needed
If the lintel is severely damaged, you might need to add steel reinforcement bars or plates. This step requires careful measurement and secure fixing.
Allow Proper Curing Time
Let the repair materials cure fully before removing any temporary supports or loading the lintel.
Seal and Protect
Finish by applying a waterproof sealant to protect the lintel from moisture and future damage.

Do You Put Mortar on a Steel Lintel?
This is a common question when dealing with steel lintels. The short answer is yes, but with some important considerations.
Steel lintels are often embedded in masonry and covered with mortar to protect them from corrosion and to help distribute the load. However, you should never apply mortar directly onto rusty steel. First, remove all rust using a wire brush or sandpaper. Then, apply a rust-inhibiting primer to prevent future corrosion.
Once the steel is clean and primed, you can apply mortar around it. Use a high-quality mortar mix designed for structural repairs. This will bond well with both the steel and the surrounding masonry, ensuring a strong, durable repair.
Tip: Avoid using regular cement mortar on steel lintels. Instead, opt for a repair mortar with additives that improve adhesion and flexibility.

Step-by-Step Guide to Repairing a Concrete Lintel
Concrete lintels can crack or spall over time due to weather exposure or structural stress. Here’s how to fix them yourself:
Prepare the Area
Remove any loose concrete and clean the surface thoroughly.
Apply Bonding Agent
Use a concrete bonding agent on the exposed surface to help the new concrete adhere properly.
Mix Repair Mortar
Prepare a high-strength repair mortar or concrete mix.
Fill Cracks and Gaps
Use a trowel to apply the mortar into cracks and damaged areas. Press firmly to eliminate air pockets.
Smooth the Surface
Level the repair area with the surrounding concrete for a neat finish.
Cure Properly
Keep the repaired area moist for several days to ensure proper curing and strength.
Pro Tip: For larger cracks, consider embedding steel reinforcement bars before applying the repair mortar to add extra strength.
When to Call in a Professional
While many lintel repairs can be done yourself, some situations require expert help:
Extensive structural damage or sagging lintels
Severe rusting or corrosion on steel lintels
Load-bearing lintels supporting heavy structures
Historic buildings requiring specialized restoration techniques
If you’re unsure about the extent of the damage or your repair skills, it’s safer to consult a professional. They can provide a thorough assessment and ensure the repair meets safety standards.
Final Thoughts on DIY Lintel Repair
Repairing lintels yourself can be rewarding and cost-effective if done correctly. Remember to always prioritize safety, use the right materials, and follow proper procedures. By applying these diy lintel repair techniques, you can extend the life of your lintels and maintain the structural integrity of your property.
If you ever feel overwhelmed or face complex issues, don’t hesitate to reach out to experts who specialize in masonry and lintel repair. Your home’s safety and durability are worth the investment.
Happy repairing!
Comments